As part of our recent deck hardware re-bedding project we refinished some short sections of the teak cap rail at the bow where the pulpit mounting feet are bolted, and midships where the mooring cleats are located. We didn't varnish it, as that would have taken too long, but we stripped, cleaned and oiled it. Not surprisingly, those refinished sections really showed up the rest of the rail, which we have admittedly neglected while trying to decide whether to keep it or replace it with an aluminium toerail. So, having shamed ourselves into action with the re-bedding project we decided to refinish the whole rail using the same methods.
Readers who have followed our blog for a while know that the cap rail has been a sort of 'bete noir' for us.......we like the look of the teak rail but not the maintenance that goes along with it.....so it has been neglected in the extreme. We keep looking at it and agreeing something should be done but we never seem to actually do anything. We soothe our consciences by telling ourselves we are too busy with all the 'more important' projects we have in process.
We have seen several other Freeports that have replaced the teak cap rail with a slotted aluminium toe rail like the Islander 36 which we think looks excellent, requires no maintenance and is much more practical than the decorative teak cap rail. Ideally we want to make that change, re-sealing the hull-to-deck joint in the process but, unfortunately, it is another major project that we can't justify at present with everything else that we are doing, so stripping and oiling the cap rail is our short term concession to aesthetics pending a final decision on the toe rail conversion.
We have seen several other Freeports that have replaced the teak cap rail with a slotted aluminium toe rail like the Islander 36 which we think looks excellent, requires no maintenance and is much more practical than the decorative teak cap rail. Ideally we want to make that change, re-sealing the hull-to-deck joint in the process but, unfortunately, it is another major project that we can't justify at present with everything else that we are doing, so stripping and oiling the cap rail is our short term concession to aesthetics pending a final decision on the toe rail conversion.

Here is a 'before' shot of a section of the cap rail on the port side of the cockpit (.....blush!). It is very representative of how the whole cap rail looked when we started the hardware re-bedding project.

This is how the cap rail looked after we finished caulking it and re-bedding the midship mooring cleats. You can see why we were shamed into action!
Between the two sides of the boat, plus the stem and the stern, there was over 75 feet of cap rail to deal with. To make things a little more manageable we decided to divide each side of the boat into 6-8 foot lengths and treat the rail in sections.

Here are our 'tools of the trade' that we used for the stripping, cleaning and oiling of the rest of the cap rail.


Here is a shot of the 'catch bag' we made to stop too much debris going into the water. It wasn't perfect but it caught most of the scrapings.... and it's the thought that counts right?

We were a bit surprised at how much of the old varnish lifted off in big sheets. Evidently it wasn't adhered nearly as well as we thought it would be.

Here is a shot showing a stripped section of rail (right) up against a section with the old varnish.


Fortunately there was enough room to use the cutting guide to control the depth of cut so, with a steady hand we were able to make the counter-bore a little deeper.

We only went deep enough to get room for a thin plug to fit, we didn't want the counter-bore so deep that it would break through at the bottom of the rail and render the screw useless.

Here is the new 1/2" plug inserted about 3/16"deep. Not ideal but adequate for what we needed.

A quick hit with the sander to level the plug and.......


.......we are back on track.

Finally we get to Step two in the cap rail re-finish project, which is a quick run over the stripped area with 180 grit production paper to knock down any small flecks of varnish that might have been missed by the scraper.

Step three is to wet the whole stripped area in preparation for applying the two part West Marine teak cleaner.

Here is the Part 1 cleaner being applied. When using the WM teak cleaner, follow the directions very carefully. The 'Part 1' stuff is very good but if it is left on too long, scrubbed too vigorously or with a brush that's too stiff or allowed to dry out before rinsing, it really raises the grain of the wood.

Here we are gently scrubbing the cleaner into the wood. It's almost scary the amount of junk that is drawn out by the Part 1 stuff. As it can stain gel-coat, all the the grime must be rinsed off quickly and thoroughly, before it dries.

Here we are repeating the process with the Part 2 cleaner. Same routine, gentle scrubbing and prompt rinsing.


Step five is to wipe everything over with acetone and, if you wish, a tack rag.

Step six is to slather teak oil all over, leave for 10 minutes and wipe off the surplus. Let stand for 15-20 minutes and repeat. Alternatively, apply the first coat of your choice of varnish if that is your preference.
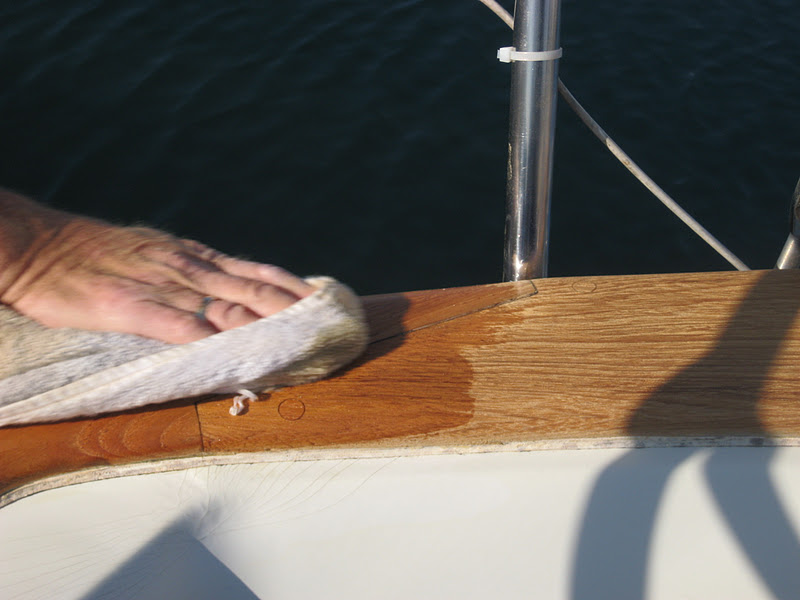
Usually, on raw wood, the first couple of oil (or varnish) applications are quickly sucked right down into the wood fibres, so at least three or four applications are needed for the best results.

And that's all there is to it. Repeat as necessary until all sections of the rail are refinished!. Here is a shot of the oiled starboard side cap rail.....looking better than it has in a year. On to the next project.
No comments:
Post a Comment