The Old Matelot


matelot;
noun,
sailor; from the French mat-el-oh (plural matelots)
A slang expression, chiefly in Britain, may also mean mate or companion.

Welcome to the Old Matelots' blog, my first (and probably last!) journalistic endeavour. Watch its development and evolution as I make the transition into retirement and the live-aboard, off the grid lifestyle on the sailing yacht, Circe. Follow my fortunes (and misfortunes) in the posts as I work to rehabilitate my home on the water.

UPDATE - Due major back-to-back relationship and health issues during 2017 & 2018 I was involuntarily beached and forced to let Circe go. The blog will remain up for the foreseeable future for informational benefit to other owners of these magnificent boats.


*******************************************************************************************************************************************************************


2010-09-28

Head Ceiling/Headliner Repair

Most of Circe's vinyl ceiling and head liners are original and are in very good shape throughout the boat....with one exception, in the head! For reasons best known to the factory, all the ceiling-liner installations were done using plain steel upholstery staples. Time and  moisture causes the staples to corrode and disintegrate, allowing the liner and the trim welt to separate from the backing panels, leaving black stains on the teak below......UGLY. Past leaks from the port above the vanity had made things even worse! There was evidence of the problem in a couple of places, but over the vanity it was severe. 

This corrosion of staples seems to be a common problem with Islanders in general and Freeports in particular. The use of plain steel rather than stainless or monel staples might have been a cost reduction exercise, a simple oversight or a fundamental specification error but, whatever the reason, it resulted in an unsightly mess that needed to be repaired. 


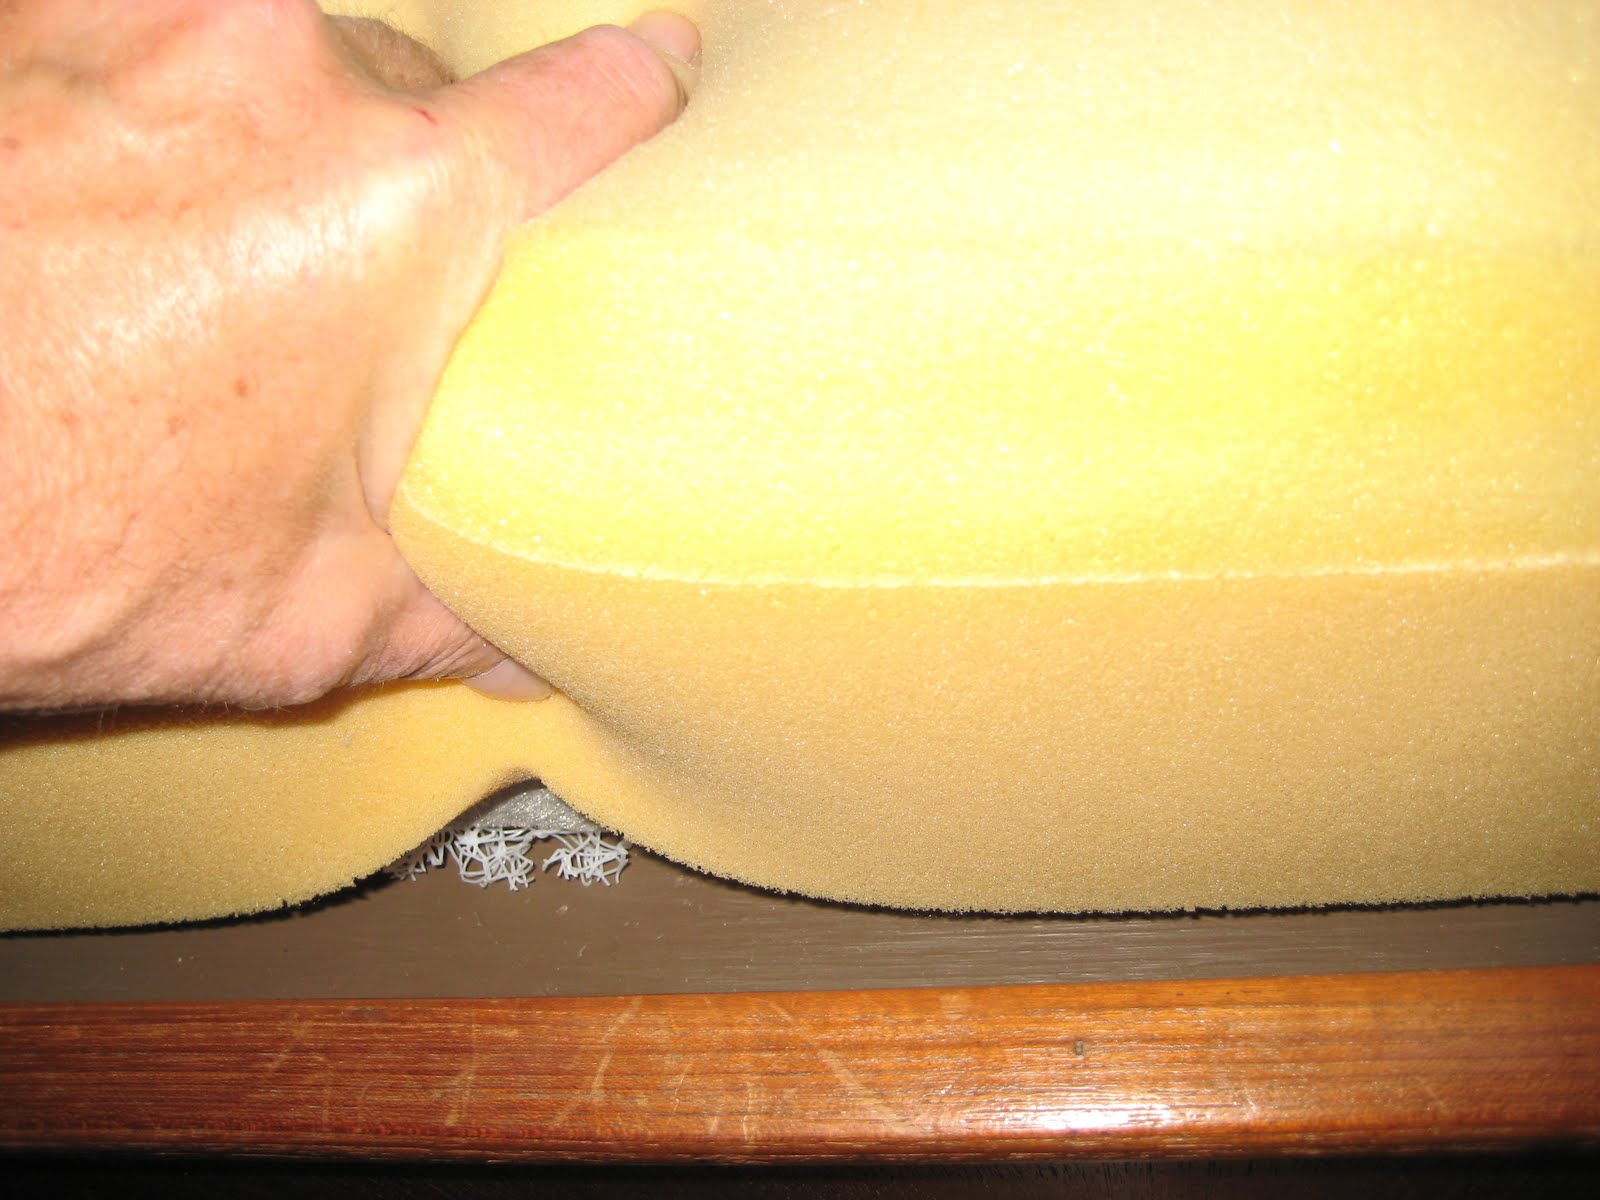
As soon as we started to pry open the trim welt, the whole thing fell apart!


The one good thing with the rusty staples was that everything pulled apart easily, but the bad thing was all the sharp, rusty little 'stumps' left sticking up from the backing panel.......some matelot blood was spilled!!! We couldn't pull them out, they were too fragile, so we pounded them into the panel and hoped they wouldn't interfere with the new staples.


Almost the whole length of the vanity was affected so we tore it all off.


While the vinyl was detached we went after the stains on the backing panel with a one-part teak cleaner from WM.


(A little detour from the head-liner here)
This teak cleaner worked really well on the black stains, so well that we tried it on some bad stains inside the vanity........presto, magico......gone! A little teak oil and the whole interior of the vanity was better than new! We are going to varnish the vanity exterior.


Vanity Lower Shelf - With Teak Cleaner Applied


Vanity Lower Shelf - After Teak Cleaner


Vanity Lower Shelf Partially oiled. Watco is much cheaper and just as good or better than a similar 'marine' teak oil product.


(Back to the head-liner)
When the vinyl had first been installed it appeared to have been cut oversize, so as to have something to hold while stretching and stapling the bottom edge. After the stapling was finished it was trimmed off close to the staples so it could be covered by the trim welt but now there was nothing left to grab on to as we tried to re-stretch and re-staple it. 


We ended up using the heat gun (very carefully!) and softened the vinyl so that we could pull it tight again while staying as close as possible to the original position.


With so little to hold on to it was difficult to get a perfectly aligned edge but we did the best we could. Yes, those are stainless steel staples!


It all turned out pretty good although, in one spot, the original vinyl edge had been trimmed so tight against the factory staples that there was literally nowhere for us to put our staple, so we got a small sag. Its still 1000% better than it was!  


2010-09-11

Caulking Chain Plates

Last weekend I was hosing all the crud and bird crap off Circe while Marie was sitting in the dinette making a phone call and she noticed a couple of drops of water run down from the port aft chain plate mount. We took a look at the top of the chain plate and saw that the caulking on it looked a bit rough.


A quick look at the other five plates confirmed they were all in similar shape....new caulking was needed.


As we didn't have a lot of time and no spare cotter pins we decided to try doing the caulking without disconnecting the shrouds. It was a bit tight digging out the old caulk with just the cover plates lifted, as there wasn't a lot of room, but by making a right angle pick from an old screwdriver we got it done.


Electrical tape holding up the turnbuckle covers.


We also used a bit of electrical tape to hold each cover plate up against its clevis while we were working.


We used 3M 4000 which we have found to be a good compromise sealer for deck hardware that will be removed periodically. It has a bit more strength than other polysulphide sealants but it doesn't cure up solid.


We had three attempts at cutting the nozzle before getting the right size bead without needing bionic fingers to squeeze the caulk out!


A wipe over with bit of acetone to clean up and things look a lot better. More importantly, no more leaks!

2010-09-06

Mattress Moisture!

When we first inspected Circe's fixtures and fittings, we found signs of moisture damage on the underside of the mattress cover in the Pullman Berth. After the purchase we decided that fixing the mattress needed to go to the top of our 'to do' list. The mattress is a 2 ply foam laminate with a 4 inch base of medium density foam bonded to a softer 2 inch top layer, all enclosed in a full zippered cover with a quilted top and heavy fabric bottom. We couldn't establish if it was original equipment from 1982 or a later addition but, in any event, the cover was very scruffy so we ditched it. 

The foam itself was in good shape so we decided to keep it. The challenges were what to do about replacing the cover and what to do about the moisture issue.


The Freeport's Pullman Berth is a plain, painted plywood platform which is a common design for many older boats and RV's but it is also a magnet for moisture creation. The natural temperature gradient between the warm mattress and the cool or cold base creates a very efficient moisture generator. Depending on the ambient temperature and humidity, the bedding materials, the frequency of use...live aboard vs weekending...and the quality of 'housekeeping', moisture problems can be moderate to severe or non-existant. In Circe's case, she had seen a lot of use in her youth but had been used infrequently for several years in Northern CA before becoming a bit of a 'Marina Queen' more recently. We plan to use her a lot, with a goal of moving aboard full time within the next 18 months to 2 years, so we wanted a good solid solution to the moisture problem.     


Common sense told us that we needed a way to lift the mattress to allow air circulation underneath it but that was easier said than done. Complicating matters is the shelf that runs around the outboard and forward sides of the berth a little over a foot above the bed base. Anything that lifts the mattress closer to the shelf effectively reduces the length of the sleeping area so we needed something thin. Enter HyperVent mesh!


We found numerous good reviews and references for this stuff. It is not too expensive, it can be cut easily, it is durable and it is less than an inch thick....ideal for our application. 

Everything you ever wanted to know about HyperVent mesh.


Because the mesh is only available in metre (39") wide rolls we knew there would have to be at least one join somewhere. In the interest of economy and access to the hatches in the berth base we decided to put the join across the berth. Ideally we would have liked it fore and aft along the sleeping area but we would have had to buy more material.


We ordered 10 feet and double checked our measurements while we waited for it to arrive. It came within 4 days. All the pics on the website showed a black product but in fact it is only available in white........go figure!


We were surprised at how light it was. Featherweight.


We grabbed our biggest pair of scissors, a Sharpie Marker and stopped by Ace Hardware to pick up some double sided carpet tape to make the join. We measured numerous times in the hope that we wouldn't make too many mistakes.  

We continued the mesh up the hull enough to come above the mattress for both insulation and to help with air circulation. 

Cutting neatly and accurately into the corners was a bit of a chore but it worked out.


Here is the finished underlay


Here is the mattress in place showing the mesh extending slightly above it.


Slight mattress overhang and enough space for bedding without blocking the airflow through the mesh.


Another view of the mattress overhanging the mesh.

The only thing remaining is a top cover for the mattress. We decided not to have a full replacement cover but to get a custom made 'Tufted Topper' from CLR Marine http://www.clrmarine.com/100.html  for the top. More on that in a future post.

UPDATE 11-11-15
The Hyervent underlay has worked extremely well for us. We have lived aboard full time for four years in four season weather and there has been no recurrence of the moisture problem. On the rare occasions we need to access the storage areas under the Pullman berth the underlay can be quickly and easily removed and rolled up for convenient storage. Hypervent has proven to be a very good product.