Our original plan to get off the grid has always been to have five separate power source options; (1) Shore AC, (2) Gas Generator AC, (3) Perkins Diesel DC, (4) Wind DC, (5) Solar DC. The next project on 'The List' was to get a wind generator up and running, so we started to look for candidates. There are numerous wind generators on offer for marine use so our two decisions were to select the best unit for us and decide on the best method of mounting it.
First up.....which generator to buy? After a lot of web research and querying other users here in the 'hood we made a shortlist of two units; the AirBreeze and the Superwind. Both have comparable outputs and features that are extensively documented in their respective promo material and we also found a very informative comparison test report here;
Also interesting was this little Superwind promo video;
The AirBreeze is made in the US and the Superwind is made in Germany (supported through US Distributors). Even though the AirBreeze is reportedly much better than its predecessor (Air-X), has the better price and the larger customer base we finally decided on the Superwind. The popular AirBreeze works well enough but we just felt that, based on everything we could discover, the Superwind blade design would be much quieter in operation. Also, with its almost industrial build quality, we thought the generator unit would hold up better over the long haul.

Next up.....how best to mount the Superwind? Surprisingly, this proved to be the more difficult decision to make. Until fairly recently we had been seriously considering a stern arch as a convenient one-step way to deal with wind generator, solar panels, dinghy and davits, bimini mounts, Lifesling, MOB Pole, spare propane tanks, stern anchor, fenders, GPS and radar antennas plus miscellaneous other items.
Stern arches aren't built from particularly heavy gauge material but their convenience seems to lead people to load them up with mountains of 'stuff'. An arch is certainly an attractive and versatile addition but, by chance, we recently had the opportunity to learn more about the behavior of a stern heavy boat in a seaway........not pretty! We watched at close quarters as a Cal (Lapworth) 35 tackled steep SF Bay chop, with a stern arch and everything but the kitchen sink hanging out back.
 The Cal 35 design is very close to a Freeport, with similar dimensions and underbody (except for the rudder skeg) and this one was pitching up and down to beat the band. It made us stop and think about weight distribution. The Freeport is inherently stern heavy, so much so that early boats needed extra bow ballast to sit on their lines and later boats had smaller fuel tanks and lighter galley cabinetry to reduce stern weight. We know how Circe handles with minimal weight (8hp Outboard plus 350lbs of Old Matelots) on the stern, but we wondered what effect +/-800 lbs of extra stern weight (or even more if we had guests on board) would do to her? We've seen plenty of Freeports outfitted for cruising with massive load penalties over the design weight, usually biased toward the stern, with no ill effects reported other than an increase in draft. Even so, we couldn't imagine there was no negative impact, particularly when heading into steep seas.
So, bottom line, we decided to pass on the arch and go with a pole mount for the Superwind. We chose a stainless pole made by Klacko Marine in Canada. Why? Because everything about it seemed very well built and less likely to corrode than powder coated aluminium.....plus the price was right. We'll leave the dinghy on the fore-deck and deal with mounting our radar and other cruising items as and when we get to them.
 Here is the pole support bracket going onto the transom. Note the 1/4" thick stainless steel used for this stand-off. Also visible is the butyl mastic sealing the mounting. We love that butyl....so much better than any of the caulks we've tried.
 So that's why we put those cockpit speakers in! Seriously, without them it would have been a nightmare trying to reach the support bracket nuts and washers up inside the transom. The bottom section of the 2.25 inch diameter ss pole is visible at left.
 This shot shows the pole socket mounted to the stand-off bracket. Once again rugged and nicely engineered. Unlike other generators, Superwind requires no rubber vibration isolation in the pole mount. They say Superwind is so well balanced no isolation is needed.....we'll see!

Here is the bottom section of the pole sitting in the socket while we use the Mk 1 eyeball to check for vertical placement fore and aft.........


 ......we marked the positions of the upper clamping collars that secure the two braces to the pole. We used painters tape for the vertical position and a pencil mark for the lock screw positions. Then we took.............

..........everything apart again and drilled the pole for the locking screws.

After all the holes were drilled we fitted the locking screws and secured the clamp collars.

At this point we also installed a strain relief fitting in the pole socket.
 Once the clamp collars were correctly positioned and secured we re-assembled everything and re-checked the position of the braces. Everything looked good so we secured the upper ends of the braces to the pole and moved on to securing the bottom ends of the braces.

Here is the bottom bracket on the 'fore and aft' brace being positioned on the starboard gunwale.

This shot shows the bottom bracket and brace assembled and sealed with butyl mastic.
 Here is the bottom bracket for the 'side to side' brace. Ideally we wanted to avoid putting fasteners into the cap rail but couldn't avoid it here, without a fancy custom bracket of some sort.

All brackets and braces in place...... everything seems pretty solid!

Now, on to the generator itself. Here are some of the bits and pieces as we unpacked them (blades and charge controller not shown).
 Here is the secret of Superwind's success...... according to them! They reckon the unique blade profile makes theirs the quietest and smoothest wind generator on the market.

These little raised chevrons on both sides of the leading edge of the blades are supposed to do something to the boundary air layer passing over the blade which reduces noise........hope so!

Here we've installed a cable clam fitting on the transom and dropped the pole to start feeding the #8 duplex cable. We used #8 to minimise resistance in the long cable run to the controller.

This shows the rest of the pole with the cable partially threaded through. We put zip ties around the duplex cable every couple of feet to stop it tapping against the inside of the pole.
 Here we are connecting the #12 generator output wire to the #8 duplex. We coated the crimp connectors with liquid tape, put shrink sleeves over them and finally taped them to a zip tie 'hanger' (just visible) to take the weight of the cable off the connectors.
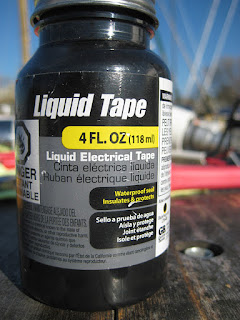
This is the goop we used under the shrink sleeves, just a little added insurance.

This shot shows the pole re-assembled and the generator mounted.

Here is a close up of the generator ready for blades and tail vane.

Tail vane mounted, working on spinner and blades.

Generator assembly complete, ready for pole raising.

Here we've tidied up the cable loop at the base of the pole and fitted split sheathing to give it some UV protection.

We mounted the kill switch temporarily in the hole where the old telephone outlet used to be. This whole area will be changed when we build new electrical panels.

Here is the controller and the dump resistors installed.
 Ta Daaa.......up and running. Take that PG&E.....who needs you!
Predictably the day we finished the installation there was barely any wind........Duh! There were a few light gusts that got the generator moving for a couple of minutes each time and it seemed very smooth and quiet but we will post a more detailed update shortly with comments on performance, noise and vibration etc.
UPDATE 2-1-2012
Well, this generator is indeed quiet and smoooooth! We literally can't tell if it is running when we are inside the boat. Even when we are in the cockpit there is absolutely no vibration and barely any blade noise, even in 15 knots of wind! There are AirBreeze units on three neighboring boats and we can hear them all. The noise from the nearest one, four slips away, is quite loud. Despite all our pre-purchase research on the Superwind we were still a bit doubtful about the manufacturer's 'whisper quiet' claims prior to installation, but we are believers now! As far as power output is concerned, we think that the 'cut in' wind speed might be a bit higher than advertised....closer to 9 mph than 7.8 mph but, by using a handheld anemometer and our new Xantrex LinkLite charge monitor, we confirmed all the other claims on the published power curve, as far as conditions allowed. Actually, our unit repeatedly betters the predicted 5.4 amps (65 Watts) in the 18 mph (8 metres/sec) gusts commonly felt in our marina during summer afternoons.
UPDATE 4-18-2013
First the bad news....after 18 months of flawless service we had a weird problem with the Superwind. The generator began failing to go into brake mode when the stop switch was operated. The generator and charge controller both were working fine in 'run' but, when 'stop' was selected, instead of hearing the distinct buzzing noise as current was directed to the dump resistors, and seeing the generator blade speed drop rapidly into a slow idling condition, there was no noise and the generator actually sped up! It had stopped generating electricity but, because the rotor and stator were not being shorted together, it just became unloaded and was just spinning free in the wind.
Now the good news....the customer service we experienced from Mark Dettmer at Starboard Sun Superwind's Main US distributor, was excellent. The problem was quickly identified as a faulty stop switch (not a Superwind product) and as we were still inside the 2 year warranty period a new switch was quickly supplied at no charge. The Superwind was quickly back up and doing the business! Mark's response was such a pleasant change from the reaction and treatment doled out by some other suppliers of marine equipment when their products develop problems.
Stern arches aren't built from particularly heavy gauge material but their convenience seems to lead people to load them up with mountains of 'stuff'. An arch is certainly an attractive and versatile addition but, by chance, we recently had the opportunity to learn more about the behavior of a stern heavy boat in a seaway........not pretty! We watched at close quarters as a Cal (Lapworth) 35 tackled steep SF Bay chop, with a stern arch and everything but the kitchen sink hanging out back.

So, bottom line, we decided to pass on the arch and go with a pole mount for the Superwind. We chose a stainless pole made by Klacko Marine in Canada. Why? Because everything about it seemed very well built and less likely to corrode than powder coated aluminium.....plus the price was right. We'll leave the dinghy on the fore-deck and deal with mounting our radar and other cruising items as and when we get to them.


Here is the bottom section of the pole sitting in the socket while we use the Mk 1 eyeball to check for vertical placement fore and aft.........

........and side to side.

Once we were happy that the socket was holding the pole close to vertical we mounted the top pole section and the support braces to find the best position for them. Here is a trial mount of the fore and aft brace.

In this one both braces are temporarily positioned.

Another quick eyeball check that things are still nice and vertical then........


..........everything apart again and drilled the pole for the locking screws.

After all the holes were drilled we fitted the locking screws and secured the clamp collars.

At this point we also installed a strain relief fitting in the pole socket.


Here is the bottom bracket on the 'fore and aft' brace being positioned on the starboard gunwale.

This shot shows the bottom bracket and brace assembled and sealed with butyl mastic.


All brackets and braces in place...... everything seems pretty solid!

Now, on to the generator itself. Here are some of the bits and pieces as we unpacked them (blades and charge controller not shown).


These little raised chevrons on both sides of the leading edge of the blades are supposed to do something to the boundary air layer passing over the blade which reduces noise........hope so!

Here we've installed a cable clam fitting on the transom and dropped the pole to start feeding the #8 duplex cable. We used #8 to minimise resistance in the long cable run to the controller.

This shows the rest of the pole with the cable partially threaded through. We put zip ties around the duplex cable every couple of feet to stop it tapping against the inside of the pole.


This is the goop we used under the shrink sleeves, just a little added insurance.

This shot shows the pole re-assembled and the generator mounted.

Here is a close up of the generator ready for blades and tail vane.

Tail vane mounted, working on spinner and blades.

Generator assembly complete, ready for pole raising.

Here we've tidied up the cable loop at the base of the pole and fitted split sheathing to give it some UV protection.

We mounted the kill switch temporarily in the hole where the old telephone outlet used to be. This whole area will be changed when we build new electrical panels.

Here is the controller and the dump resistors installed.

Predictably the day we finished the installation there was barely any wind........Duh! There were a few light gusts that got the generator moving for a couple of minutes each time and it seemed very smooth and quiet but we will post a more detailed update shortly with comments on performance, noise and vibration etc.
UPDATE 2-1-2012
Well, this generator is indeed quiet and smoooooth! We literally can't tell if it is running when we are inside the boat. Even when we are in the cockpit there is absolutely no vibration and barely any blade noise, even in 15 knots of wind! There are AirBreeze units on three neighboring boats and we can hear them all. The noise from the nearest one, four slips away, is quite loud. Despite all our pre-purchase research on the Superwind we were still a bit doubtful about the manufacturer's 'whisper quiet' claims prior to installation, but we are believers now! As far as power output is concerned, we think that the 'cut in' wind speed might be a bit higher than advertised....closer to 9 mph than 7.8 mph but, by using a handheld anemometer and our new Xantrex LinkLite charge monitor, we confirmed all the other claims on the published power curve, as far as conditions allowed. Actually, our unit repeatedly betters the predicted 5.4 amps (65 Watts) in the 18 mph (8 metres/sec) gusts commonly felt in our marina during summer afternoons.
UPDATE 4-18-2013
First the bad news....after 18 months of flawless service we had a weird problem with the Superwind. The generator began failing to go into brake mode when the stop switch was operated. The generator and charge controller both were working fine in 'run' but, when 'stop' was selected, instead of hearing the distinct buzzing noise as current was directed to the dump resistors, and seeing the generator blade speed drop rapidly into a slow idling condition, there was no noise and the generator actually sped up! It had stopped generating electricity but, because the rotor and stator were not being shorted together, it just became unloaded and was just spinning free in the wind.
Now the good news....the customer service we experienced from Mark Dettmer at Starboard Sun Superwind's Main US distributor, was excellent. The problem was quickly identified as a faulty stop switch (not a Superwind product) and as we were still inside the 2 year warranty period a new switch was quickly supplied at no charge. The Superwind was quickly back up and doing the business! Mark's response was such a pleasant change from the reaction and treatment doled out by some other suppliers of marine equipment when their products develop problems.
Hey thanks guys this is some good reviews I've been looking at youtube on something like this... and found nothing. Good job going off the grid, I will do so myself soon!
ReplyDelete