After ripping our hands several times recently on the various 'meathooks' hidden in the wire sections of the old halyards we decided they needed to go. Instead of staying with the same style of halyard we also decided to go with all-rope replacements and make all the halyards identical and interchangeable. Other than the vang and mainsheet we don't have lines led aft on Circe so it was an easy decision to make all the new halyards the same length and get a bit of redundancy in the rig.
.JPG)
As we don't do mast climbing, other than in dire emergencies, we hired Todd, our local Rigging Maestro, to do all the hairy stuff. Here he is going up the stick on a preliminary 'recce' to establish what needed to be done.
We knew that the masthead sheaves were original, grooved for wire, and that a couple of them felt very sticky so it was no surprise when Todd confirmed that "all four sheaves were terminal"! Wait a sec....four sheaves? We only have three lines to the masthead; the main halyard and the boom topping lift on the aft side of the mast and the genoa halyard on the forward side. Evidently we had a spare forward sheave!
Four masthead sheaves had been installed by Islander but only three were being used so, while replacing them, we could easily install an additional spare halyard. We pressed ahead. We would need to come up with a new exit plate and cleat for the new fourth halyard but that should be fairly easy. Todd started pulling out the old sheaves while we went out looking for new ones suitably profiled for all rope halyards, a new exit plate, new halyards and a new cleat. When we got back to the boat the first two of the old sheaves were out......and very sad they looked!


Here are the old wire (left) and new rope (right) sheave profiles. To accommodate the new, slightly thicker sheaves we had to shave approx 3/32" off the acrylic center spacer. It does double duty, spacing the sheaves apart on the axle and stopping the halyards from jumping off.
The next step was to install an exit plate for the new, fourth halyard, but where? There were two exit plates on the stbd side of the mast but only one on the port side. It was at this point we realised the existing halyards had been crossed? The main halyard was running over the port aft sheave and exiting the mast from a stbd forward plate. The topping lift was running over the stbd aft sheave and exiting the mast from a port forward plate and the genoa halyard was running over the port forward sheave and exiting the mast from a stbd aft plate!!!! Between the crossed halyards and frozen sheaves it was no wonder everything felt tight.
We measured the positions of the three existing exit plates and found they were installed in both an alternating and staggered pattern. There was 12" vertical spacing between each plate and each plate was located in alternating positions on either the forward or aft side of the mast centreline. To maintain this pattern the new 4th exit plate would have to go on the port side of the mast, aft of the centreline and either 12" below the lowest plate or 12" above the highest one. Using the lower location would put the new plate very close to the port side halyard winch. Using the upper location would put the plate very close to one of the lazy jack pad eyes and an old inspection decal.
.JPG)
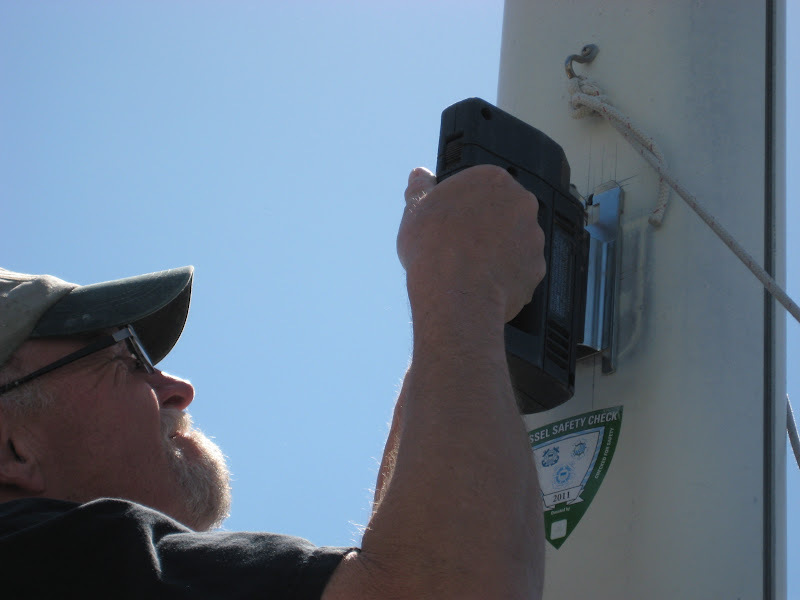
We finally decided to go with the upper location for the plate and steal a couple of inches off the ideal 90" up from the cabin roof. We went 88" up, enough to miss the pad eye but right on top of the old decal.

Not the best shot but this one shows that when we cleaned the old decal off to get a clean surface to work with we also lost a lot of paint, which was both surprising and disappointing. Looks like an Awlgrip paint job for the mast is in our future!

After marking out the position of the new aperture we step-drilled holes in the four corners until we could get the jigsaw blade in.
Using the jigsaw to connect the corner holes.

Close up of the first vertical jigsaw cut.

Aperture cleaned up and all edges smoothed off with file and emery paper. Ready for rivets.

One of the original three-rivet exit plates. We couldn't find a new plate that matched them so we had to settle for a standard four-rivet Schaefer plate.

New plate in place, spotting through and drilling for first rivet.

A thin layer of 3M 4200 to prevent corrosion between the stainless plate and rivets and the aluminium mast extrusion.

Setting the rivets.
.JPG)
Finished exit plate installation, ready to thread halyard.
.JPG)
New halyards threaded on stbd side. The main halyard runs over aft stbd sheave and exits stbd rear plate (top). The genoa halyard runs over the forward stbd sheave and exits stbd forward plate (bottom).
.JPG)
New halyards threaded on port side. The topping lift runs over the aft port sheave and exits the port rear plate (top). The spare halyard runs over the forward port sheave and exits port forward plate (bottom).
Although it made them a bit heavier than necessary, we went with 7/16" diameter line for the new halyards, because it is a lot easier on Old Matelot hands than the smaller sizes. Line that is 3/8" diameter or less is getting more difficult for us to handle, particularly with a load, and the extra cost/weight penalty for the 7/16" isn't really significant. On to the next project.
No comments:
Post a Comment