The Old Matelot


matelot;
noun,
sailor; from the French mat-el-oh (plural matelots)
A slang expression, chiefly in Britain, may also mean mate or companion.

Welcome to the Old Matelots' blog, my first (and probably last!) journalistic endeavour. Watch its development and evolution as I make the transition into retirement and the live-aboard, off the grid lifestyle on the sailing yacht, Circe. Follow my fortunes (and misfortunes) in the posts as I work to rehabilitate my home on the water.

UPDATE - Due major back-to-back relationship and health issues during 2017 & 2018 I was involuntarily beached and forced to let Circe go. The blog will remain up for the foreseeable future for informational benefit to other owners of these magnificent boats.


*******************************************************************************************************************************************************************


2010-11-24

New Shower


Somewhere in a previous post we spoke of Circe's interior cosmetics suffering from 'benign neglect' so, in keeping with our plans to reverse that situation, we decided to start our refurbishment with the shower & head area. In another post we also described the first part of the process, which was installation of a Tecma electric head with macerator, new holding tank and new plumbing.  This post describes the installation of new shower head and mixer plus new shower curtain and track. 


The original shower head and hose were dirty, clogged and generally ugly. They were first into the trash. 


The mixer was also the 1982 original, a Price-Pfister unit with major corrosion and missing knobs. It went into the trash right behind the shower head and hose!


We checked out all the usual suspects for a replacement shower head and mixer and looked at literally hundreds of different designs. There were lots of really fancy units at some of the home improvement stores but we decided their prices were crazy for what we needed. So, our next resource was the major RV parts suppliers where we found a great, direct replacement for the mixer together with a high efficiency, low consumption shower head at PPL, for less than a third the price of a comparable household or 'marine' unit.


Oxygenics low-flow, high pressure shower head and Utopia bulkhead mount mixer.


The new shower assembly was almost a direct swap for the original but with better much performance and reduced water consumption. We had a bit of a struggle hooking up the water supply lines to the half-inch NPS threads on the mixer unit, which were molded nylon rather than machined metal, but after a bit of 'encouragement' everything went together correctly.


The only big problem we had was with the shower head holder. It was a suction pad deal, which was good because it could be moved around to suit different height people, but it wasn't solid on the hull liner and kept coming loose or falling off! It will be replaced by a screw-on version.


The shower curtain was shot and the curtain rail was rough so.....into the dumpster they went. We found a good replacement shower rail at Recmar. It was cheap and can be bent to almost any shape you want.


We went to Bed Bath and Beyond for a new curtain, a squeegee and a toilet roll holder to keep the curtain out of the way. Simple idea and it works well.


New shower head, squeegee and toilet roll holder adapted to keep the shower curtain tidy.


We also fitted a 'soap-up' valve which will help save water and add to the overall economy of the unit.


The new shower works really well and the venturi design really does seem to do more with less water. The jet is quite powerful with low consumption, very economical. We think it also looks pretty sharp too!


An old friend, with the emphasis on Old, remarked how it was reminiscent of the heat ray head on the Martian War Machines in the 1953 War of The Worlds movie.......anyone else remember back that far?


2010-11-14

Port-light Shades

When we started staying overnight on Circe we quickly discovered a lack of privacy in the head and berth area due to the absence of any shutters or blinds on the port-lights. On the hook this wouldn't be an issue but in the slip at the marina it is another matter. We are fortunate in that our slip location means we don't get a lot of foot traffic on the dock but people do come and go and, at night when we are bow-in, it is easy for a passer-by to see through the head ports when the lights are on.  Evidently our modesty threshold is somewhat lower than the PO's!


The PO had replaced all 6 of the Beckson 414 self draining ports a couple of years ago so they were in excellent shape. We had originally considered fitting the popular stainless ports from Newfound Metals but we couldn't justify such a big expense to replace essentially new ports! Either way, the absence of blinds had to be addressed.


We did a bit of research through the usual tried and true resources and quickly found a huge selection of marine blind and shade designs from the simple, cheap and cheerful to the complex, with a big price spread! We didn't want to spend a lot on what was a simple issue so we eventually found a solution at Zarcor in Texas.


Zarcor has a nice product line and we were particularly interested in their 'Peek-a Booo' sliding shutters. They are a simple design of two overlapping, slotted acrylic sheets with matching patterns of opaque strips printed on each sheet. The outer sheet attaches to the inside face of the port-light lens using self-adhesive velcro pads and the inner sheet slides on the outer sheet. When the opaque strips align, the shutter is 'open' and light comes through the clear areas. Moved to the 'closed' position, the opaque strips are misaligned and block the clear areas across the whole lens. The assembled shutter fits neatly and unobtrusively to the port lenses. They can be quickly and easily removed and replaced for cleaning and, most importantly, the price is right.

The biggest downside is that the Peek-a-Booo design blocks almost 50% of the surface of the lens, even when the shutter is open. Fortunately, we don't depend on the port-lights as much for light as for ventilation, so the reduction in light isn't a problem for us. The Zarcor promo pictures show the Peek-a-Booo being used on small ports and much larger windows and hatches where, in our opinion, the reduction in light would be much more of a problem.


Here the shutter is open


Here the shutter is closed.


The Peek-a-Booo can be custom made to suit any particular port or hatch shape but, if the port is symmetrical like the Beckson, the shutter can be reversed to offer either L to R open or L to R close.  


2010-10-02

Mattress Topper.

In a previous post we described getting rid of the moisture damaged zip-on mattress cover from the Pullman Berth and putting a mesh underlay on the bed base. Rather than get a replacement mattress cover we elected to get a custom made mattress 'topper'.  Here are a few photos of it.


We chose the Tufted Topper based on some research that suggested leaving the foam mattress open to the air rather than enclosing it would help dissipate moisture and discourage 'sweating' that can occur when the foam is fully enclosed.


Tufted Topper on the top, Hypervent mesh underlay on the bottom.


The final outcome of this purchase will fall into the category of a future 'what works and what doesn't' post when we have had some real world experience. Stay tuned!

2010-09-28

Head Ceiling/Headliner Repair

Most of Circe's vinyl ceiling and head liners are original and are in very good shape throughout the boat....with one exception, in the head! For reasons best known to the factory, all the ceiling-liner installations were done using plain steel upholstery staples. Time and  moisture causes the staples to corrode and disintegrate, allowing the liner and the trim welt to separate from the backing panels, leaving black stains on the teak below......UGLY. Past leaks from the port above the vanity had made things even worse! There was evidence of the problem in a couple of places, but over the vanity it was severe. 

This corrosion of staples seems to be a common problem with Islanders in general and Freeports in particular. The use of plain steel rather than stainless or monel staples might have been a cost reduction exercise, a simple oversight or a fundamental specification error but, whatever the reason, it resulted in an unsightly mess that needed to be repaired. 


As soon as we started to pry open the trim welt, the whole thing fell apart!


The one good thing with the rusty staples was that everything pulled apart easily, but the bad thing was all the sharp, rusty little 'stumps' left sticking up from the backing panel.......some matelot blood was spilled!!! We couldn't pull them out, they were too fragile, so we pounded them into the panel and hoped they wouldn't interfere with the new staples.


Almost the whole length of the vanity was affected so we tore it all off.


While the vinyl was detached we went after the stains on the backing panel with a one-part teak cleaner from WM.


(A little detour from the head-liner here)
This teak cleaner worked really well on the black stains, so well that we tried it on some bad stains inside the vanity........presto, magico......gone! A little teak oil and the whole interior of the vanity was better than new! We are going to varnish the vanity exterior.


Vanity Lower Shelf - With Teak Cleaner Applied


Vanity Lower Shelf - After Teak Cleaner


Vanity Lower Shelf Partially oiled. Watco is much cheaper and just as good or better than a similar 'marine' teak oil product.


(Back to the head-liner)
When the vinyl had first been installed it appeared to have been cut oversize, so as to have something to hold while stretching and stapling the bottom edge. After the stapling was finished it was trimmed off close to the staples so it could be covered by the trim welt but now there was nothing left to grab on to as we tried to re-stretch and re-staple it. 


We ended up using the heat gun (very carefully!) and softened the vinyl so that we could pull it tight again while staying as close as possible to the original position.


With so little to hold on to it was difficult to get a perfectly aligned edge but we did the best we could. Yes, those are stainless steel staples!


It all turned out pretty good although, in one spot, the original vinyl edge had been trimmed so tight against the factory staples that there was literally nowhere for us to put our staple, so we got a small sag. Its still 1000% better than it was!  


2010-09-11

Caulking Chain Plates

Last weekend I was hosing all the crud and bird crap off Circe while Marie was sitting in the dinette making a phone call and she noticed a couple of drops of water run down from the port aft chain plate mount. We took a look at the top of the chain plate and saw that the caulking on it looked a bit rough.


A quick look at the other five plates confirmed they were all in similar shape....new caulking was needed.


As we didn't have a lot of time and no spare cotter pins we decided to try doing the caulking without disconnecting the shrouds. It was a bit tight digging out the old caulk with just the cover plates lifted, as there wasn't a lot of room, but by making a right angle pick from an old screwdriver we got it done.


Electrical tape holding up the turnbuckle covers.


We also used a bit of electrical tape to hold each cover plate up against its clevis while we were working.


We used 3M 4000 which we have found to be a good compromise sealer for deck hardware that will be removed periodically. It has a bit more strength than other polysulphide sealants but it doesn't cure up solid.


We had three attempts at cutting the nozzle before getting the right size bead without needing bionic fingers to squeeze the caulk out!


A wipe over with bit of acetone to clean up and things look a lot better. More importantly, no more leaks!

2010-09-06

Mattress Moisture!

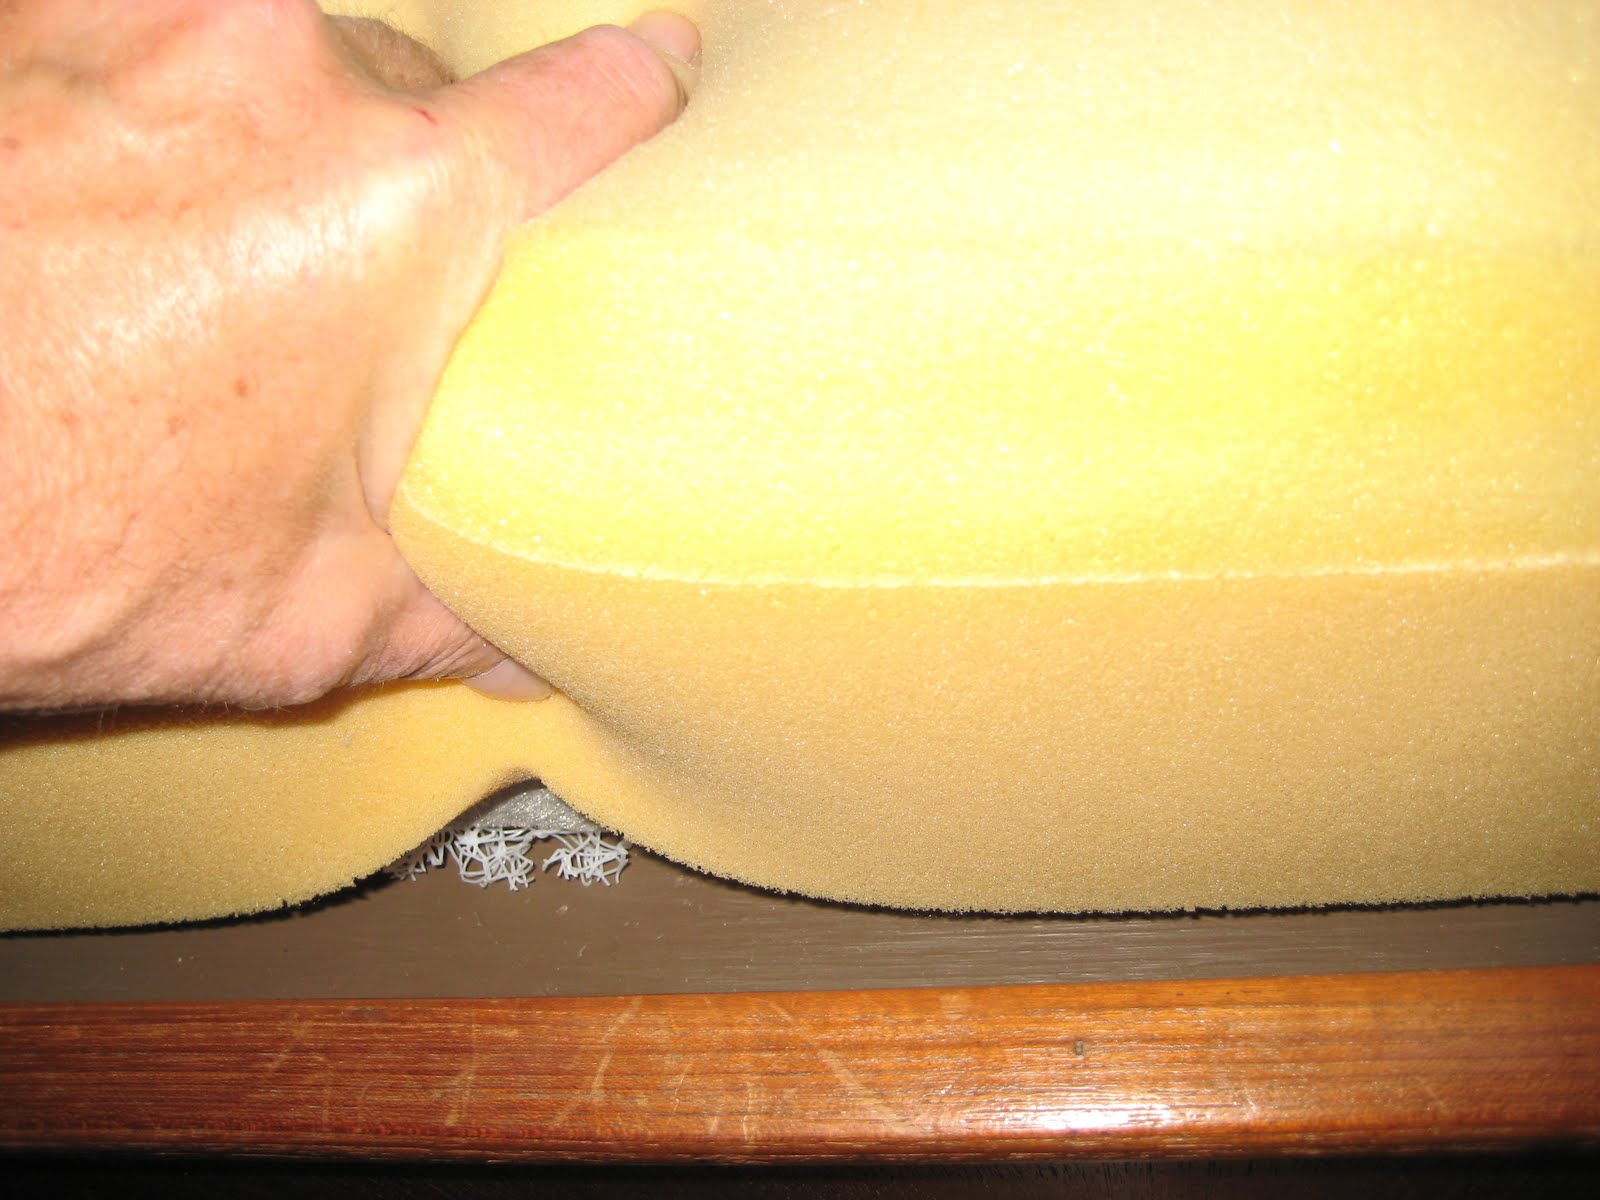
When we first inspected Circe's fixtures and fittings, we found signs of moisture damage on the underside of the mattress cover in the Pullman Berth. After the purchase we decided that fixing the mattress needed to go to the top of our 'to do' list. The mattress is a 2 ply foam laminate with a 4 inch base of medium density foam bonded to a softer 2 inch top layer, all enclosed in a full zippered cover with a quilted top and heavy fabric bottom. We couldn't establish if it was original equipment from 1982 or a later addition but, in any event, the cover was very scruffy so we ditched it. 

The foam itself was in good shape so we decided to keep it. The challenges were what to do about replacing the cover and what to do about the moisture issue.


The Freeport's Pullman Berth is a plain, painted plywood platform which is a common design for many older boats and RV's but it is also a magnet for moisture creation. The natural temperature gradient between the warm mattress and the cool or cold base creates a very efficient moisture generator. Depending on the ambient temperature and humidity, the bedding materials, the frequency of use...live aboard vs weekending...and the quality of 'housekeeping', moisture problems can be moderate to severe or non-existant. In Circe's case, she had seen a lot of use in her youth but had been used infrequently for several years in Northern CA before becoming a bit of a 'Marina Queen' more recently. We plan to use her a lot, with a goal of moving aboard full time within the next 18 months to 2 years, so we wanted a good solid solution to the moisture problem.     


Common sense told us that we needed a way to lift the mattress to allow air circulation underneath it but that was easier said than done. Complicating matters is the shelf that runs around the outboard and forward sides of the berth a little over a foot above the bed base. Anything that lifts the mattress closer to the shelf effectively reduces the length of the sleeping area so we needed something thin. Enter HyperVent mesh!


We found numerous good reviews and references for this stuff. It is not too expensive, it can be cut easily, it is durable and it is less than an inch thick....ideal for our application. 

Everything you ever wanted to know about HyperVent mesh.


Because the mesh is only available in metre (39") wide rolls we knew there would have to be at least one join somewhere. In the interest of economy and access to the hatches in the berth base we decided to put the join across the berth. Ideally we would have liked it fore and aft along the sleeping area but we would have had to buy more material.


We ordered 10 feet and double checked our measurements while we waited for it to arrive. It came within 4 days. All the pics on the website showed a black product but in fact it is only available in white........go figure!


We were surprised at how light it was. Featherweight.


We grabbed our biggest pair of scissors, a Sharpie Marker and stopped by Ace Hardware to pick up some double sided carpet tape to make the join. We measured numerous times in the hope that we wouldn't make too many mistakes.  

We continued the mesh up the hull enough to come above the mattress for both insulation and to help with air circulation. 

Cutting neatly and accurately into the corners was a bit of a chore but it worked out.


Here is the finished underlay


Here is the mattress in place showing the mesh extending slightly above it.


Slight mattress overhang and enough space for bedding without blocking the airflow through the mesh.


Another view of the mattress overhanging the mesh.

The only thing remaining is a top cover for the mattress. We decided not to have a full replacement cover but to get a custom made 'Tufted Topper' from CLR Marine http://www.clrmarine.com/100.html  for the top. More on that in a future post.

UPDATE 11-11-15
The Hyervent underlay has worked extremely well for us. We have lived aboard full time for four years in four season weather and there has been no recurrence of the moisture problem. On the rare occasions we need to access the storage areas under the Pullman berth the underlay can be quickly and easily removed and rolled up for convenient storage. Hypervent has proven to be a very good product.


2010-08-27

Tecma Electric Head

The most obvious thing we noticed when we did our first walk through on Circe was the low grade 'cessy' odour from the head. It wasn't oppressive but it was indicative of a bigger problem in the making and something we didn't want to live with. The head was an old Raritan manual unit with raw water flush into the original holding tank. The system had been re-plumbed at some point with with a low end sanitation hose but the layout was weird, the manual discharge pump for the holding tank was in-line between the tank and deck plate rather than teed off the bottom tank fitting which is more usual. Also, there was a bad kink in the hose between the holding tank and the discharge pump, a perfect point for clogs and almost impossible to clear without disconnection...YUK!! Basically the whole arrangement needed to be upgraded. We did a lot of research on system layout and types of head and got a lot of useful information on system design from Peggie Hall's site.
http://www.boatbuilding.com/article.php/MarineSanitationFactvsFolklore#marine

Choosing the actual toilet 'device' was a bit more difficult as there are so many products promising perfection! After polling FOGgers and others, reading a lot of reviews and comparing features we decided to go with a Tecma Easy Fit, an electric unit with integral macerator. A new holding tank, 'Odor Safe' hose and a system redesign to allow us the choice of either raw water or fresh water flush completed the package.

http://www.yachtproductsintl.com/category.aspx?categoryid=87

The new holding tank and manual discharge pump is now correctly plumbed with a U fitting to eliminate hose kinks. Note the nice big half inch vent elbow on the corner of the holding tank. We considered putting a second vent on the opposite corner to induce a cross-tank flow of air, and may still do that based on how the system works in practice. Plenty of air going through the holding tank goes a long way to controlling odour.


We went with the 'short' version of the Tecma Easy Fit which is designed to sit on a step. It was a perfect fit. The locker door behind cleared the seat cover (barely!) and so we only needed to put a longer hook on the entrance door stop to get a nice clean installation.


From our pre-installation measurements we thought we would need to trim a bit off the louvre door to the locker behind the head but in the end we had about a quarter inch of clearance. That was a pleasant surprise.   


The entrance door stop was also easily fixed with a longer hook that gives about a half inch clearance.


The controls are simple. The optional selector switch on the right can be set to either house (fresh) or raw (salt) water flush to match the flush water Y valve position. Pushing the button on the left delivers a shot of water to wet the bowl. Pushing the button on the right flushes the head and delivers a dose of rinsing water, then repeats a second time. The small holding tank icon in the bottom right corner of the control panel normally glows green. If the holding tank fills and trips the level sensor (last photo below) the icon in the left corner turns red and the head will not flush until the tank is emptied. It can be overridden in an emergency.


Front view of the two Y valves for switching between fresh and raw water flush (top) and between holding tank or overboard discharge (bottom). The discharge Y valve and the through hull valve (not shown) are both 'red sealed' to keep the Coasties and the Harbormaster happy.


Back view of the two Y valves which select fresh or raw water flush (top) and holding tank or overboard discharge (bottom). Also visible is the power feed to the integral macerator.


Diaphragm pump for raw water flush. 


The holding tank level sensor is the flat red and black gizmo next to the inlet elbow. If the holding tank fills up to the sensor, it trips an alarm and also prevents the head from being flushed. There are two free pump-out stations at our marina and a weekly visiting pump-out service if we get lazy, so we don't have any excuse for letting the tank get that full!


Its still early days but, so far, everything seems to be working as advertised. As every matelot knows, marine heads of all stripes are notorious for problems, both operator and system related, so we are keeping our fingers crossed and hoping we don't have to keep updating this post based on future problems!