The Old Matelot


matelot;
noun,
sailor; from the French mat-el-oh (plural matelots)
A slang expression, chiefly in Britain, may also mean mate or companion.

Welcome to the Old Matelots' blog, my first (and probably last!) journalistic endeavour. Watch its development and evolution as I make the transition into retirement and the live-aboard, off the grid lifestyle on the sailing yacht, Circe. Follow my fortunes (and misfortunes) in the posts as I work to rehabilitate my home on the water.

UPDATE - Due major back-to-back relationship and health issues during 2017 & 2018 I was involuntarily beached and forced to let Circe go. The blog will remain up for the foreseeable future for informational benefit to other owners of these magnificent boats.


*******************************************************************************************************************************************************************


2011-11-09

Cap Rail

As part of our recent deck hardware re-bedding project we refinished some short sections of the teak cap rail at the bow where the pulpit mounting feet are bolted, and midships where the  mooring cleats are located. We didn't varnish it, as that would have taken too long, but we stripped, cleaned and oiled it. Not surprisingly, those refinished sections really showed up the rest of the rail, which we have admittedly neglected while trying to decide whether to keep it or replace it with an aluminium toerail. So, having shamed ourselves into action with the re-bedding project we decided to refinish the whole rail using the same methods. 

Readers who have followed our blog for a while know that the cap rail has been a sort of 'bete noir' for us.......we like the look of the teak rail but not the maintenance that goes along with it.....so it has been neglected in the extreme. We keep looking at it and agreeing something should be done but we never seem to actually do anything. We soothe our consciences by telling ourselves we are too busy with all the 'more important' projects we have in process.

We have seen several other Freeports that have replaced  the teak cap rail with a slotted aluminium toe rail like the Islander 36 which we think looks excellent, requires no maintenance and is much more practical than the decorative teak cap rail. Ideally we want to make that change, re-sealing the hull-to-deck joint in the process but, unfortunately, it is another major project that we can't justify at present with everything else that we are doing, so stripping and oiling the cap rail is our short term concession to aesthetics pending a final decision on the toe rail conversion.


Here is a 'before' shot of a section of the cap rail on the port side of the cockpit (.....blush!). It is very representative of how the whole cap rail looked when we started the hardware re-bedding project.


This is how the cap rail looked after we finished caulking it and re-bedding the midship mooring cleats. You can see why we were shamed into action!


Between the two sides of the boat, plus the stem and the stern, there was over 75 feet of cap rail to deal with. To make things a little more manageable we decided to divide each side of the boat into 6-8 foot lengths and treat the rail in sections.


Here are our 'tools of the trade' that we used for the stripping, cleaning and oiling of the rest of the cap rail.


Step one is the stripping of old varnish using the heat gun and pull-scraper. It is tough to keep the scrapings out of the water (which is a certain nasty-gram from the harbormaster) so we made a 'catch bag' out of a piece of plastic drop cloth taped to the side of the hull. 


Here is a shot of the 'catch bag' we made to stop too much debris going into the water. It wasn't perfect but it caught most of the scrapings.... and it's the thought that counts right?


We were a bit surprised at how much of the old varnish lifted off in big sheets. Evidently it wasn't adhered nearly as well as we thought it would be.


Here is a shot showing a stripped section of rail (right) up against a section with the old varnish.


OK, ready for a detour? Of course you are, it wouldn't be an Old Matelot project without a horror story attached would it? We found this cap rail screw lurking close to the starboard aft mooring cleat. Seems that the counter-bore  for the screw was originally cut too shallow and the cover plug was so thin it got sanded away over the years. Predictably nobody had tried to fix it.


We stripped all the surrounding varnish, took the screw out and tried to scare up a 1/2" Forstner drill bit to cut the counter-bore a bit deeper. We only had 3/8" and 1/4" sizes so, rather than taking the time and expense to go and buy one we used the mighty Dremel and improvised.


Fortunately there was enough room to use the cutting guide to control the depth of cut so, with a steady hand we were able to make the counter-bore a little deeper.


We only went deep enough to get room for a thin plug to fit, we didn't want the counter-bore so deep that it would break through at the bottom of the rail and render the screw useless.


Here is the new 1/2" plug inserted about 3/16"deep. Not ideal but adequate for what we needed.


A quick hit with the sander to level the plug and.......


.......we are back on track.


Finally we get to Step two in the cap rail re-finish project, which is a quick run over the stripped area with 180 grit production paper to knock down any small flecks of varnish that might have been missed by the scraper.


Step three is to wet the whole stripped area in preparation for applying the two part West Marine teak cleaner. 


Here is the Part 1 cleaner being applied. When using the WM teak cleaner, follow the directions very carefully. The 'Part 1' stuff is very good but if it is left on too long, scrubbed too vigorously or with a brush that's too stiff or allowed to dry out before rinsing, it really raises the grain of the wood.

Here we are gently scrubbing the cleaner into the wood. It's almost scary the amount of junk that is drawn out by the Part 1 stuff. As it can stain gel-coat, all the the grime must be rinsed off quickly and thoroughly, before it dries.


Here we are repeating the process with the Part 2 cleaner. Same routine, gentle scrubbing and prompt rinsing. 


After the rail is completely dry, Step four is to protect the hull and deck with a couple of layers of painters tape and then sand thoroughly with 180 grit production paper followed by 220 grit to finish. The tape is a good idea because it is easy to slip off the cap rail and scuff the gel coat when sanding close to the edges. (Don't ask how we know this!)


Step five is to wipe everything over with acetone and, if you wish, a tack rag.


Step six is to slather teak oil all over, leave for 10 minutes and wipe off the surplus. Let stand for 15-20 minutes and repeat. Alternatively, apply the first coat of your choice of varnish if that is your preference.
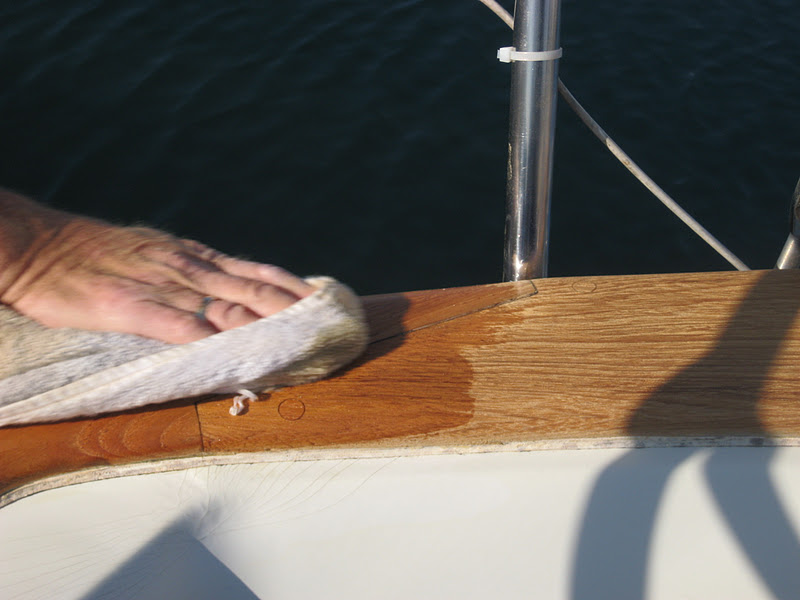

Usually, on raw wood, the first couple of oil (or varnish) applications are quickly sucked right down into the wood fibres, so at least three or four applications are needed for the best results.


And that's all there is to it. Repeat as necessary until all sections of the rail are refinished!. Here is a shot of the oiled starboard side cap rail.....looking better than it has in a year. On to the next project.

2011-11-06

Re-bedding Deck Hardware

One of our summer 2011 projects that kept slipping back due to time pressures and priority shifts was to re-bed all the deck hardware and replace all the lifelines. We have a couple of small but persistent topside leaks coming from indeterminate locations in the vicinity of the cap rail amidships that we wanted to address before the bad weather sets in. As the plastic covering on the lifelines is badly cracked  and split, with signs of corrosion setting in, the lifelines will be replaced at the same time.

So, after seeing a forecast for a spell of good weather we decided to make a start. From past experience we knew that inadequate bedding of deck hardware can often be the source of sneaky leaks, so we pulled off the lifelines and began by removing the bow pulpit and then kept working our way aft.


After removing the lifelines we decided to keep the pelican hook latches at the boarding gates as they were in good shape, but all the other lifeline hardware was either corroded or ratty looking and was ditched.
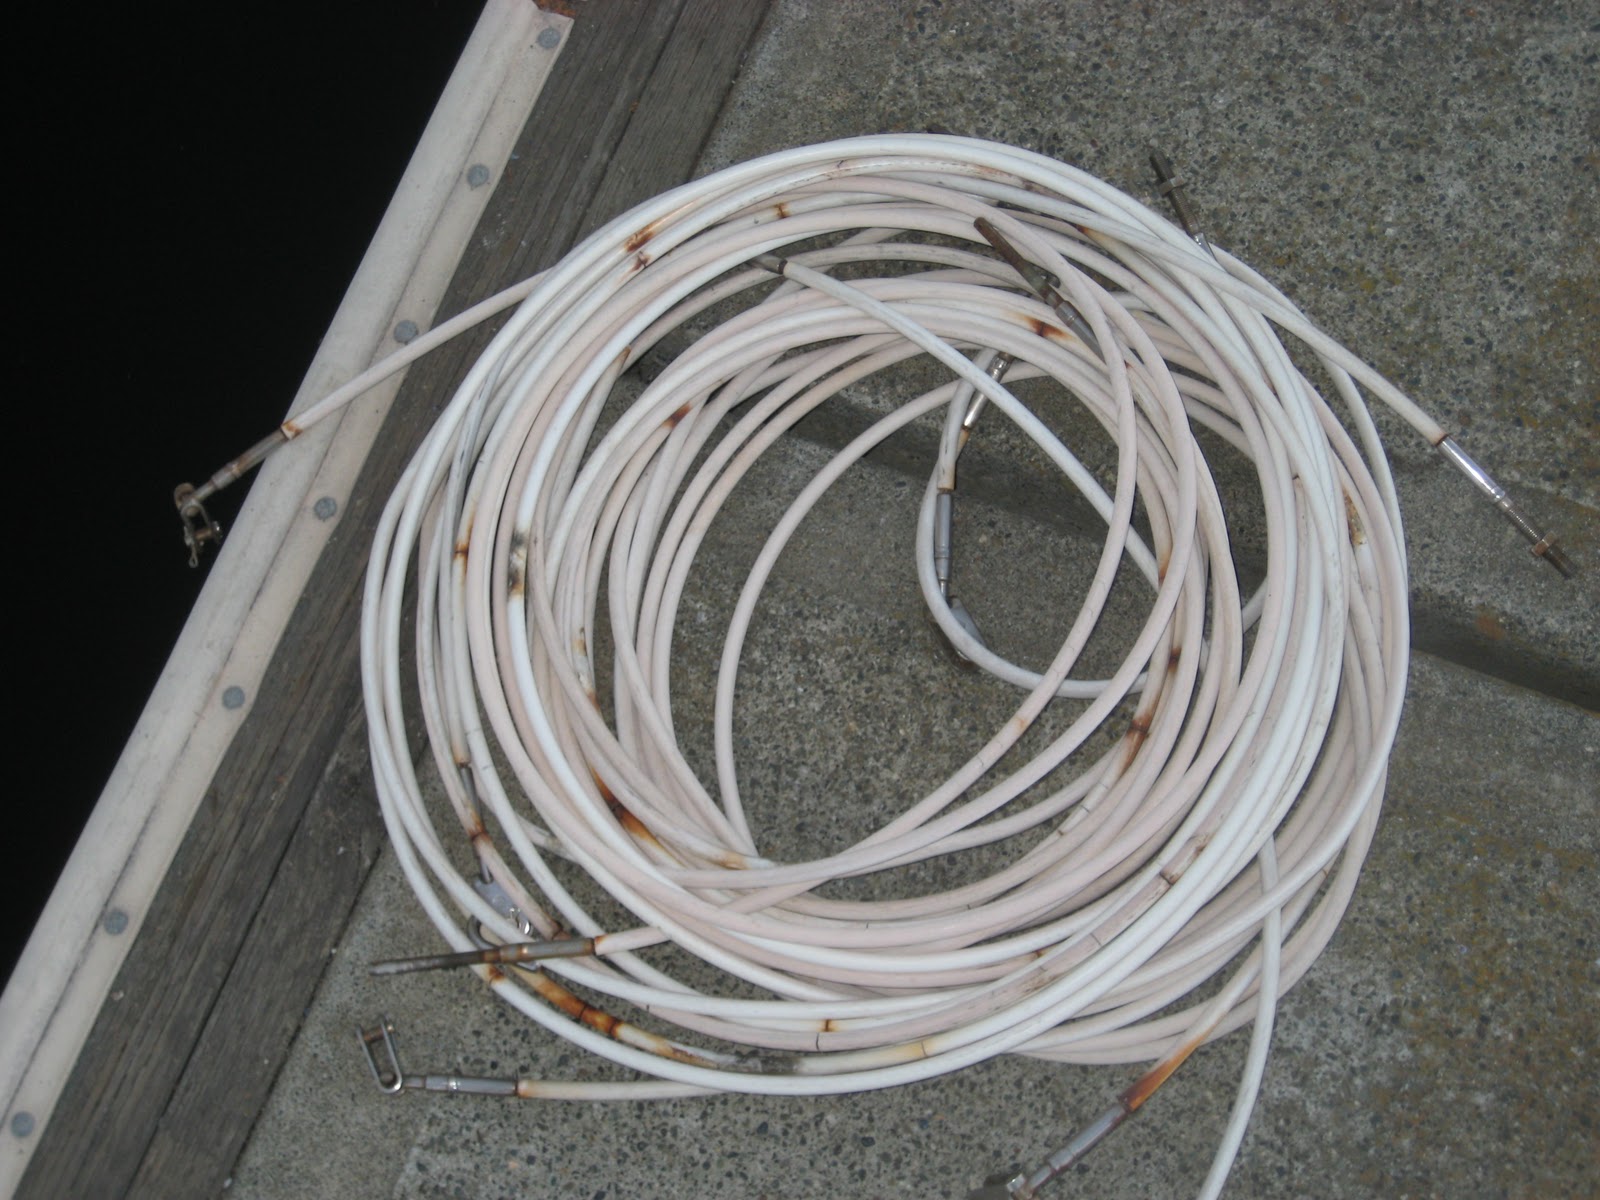
This shot shows the corrosion that occurs when the plastic coating on the lifeline fails. It is a myth that stainless wire doesn't corrode. It will resist corrosion, but only if there is plenty of oxygen present. If moisture is trapped against the wire in a confined space and oxygen is limited then it corrodes quite happily. Plastic coated lifelines and swaged terminals provide just such conditions.


Here are the old lifelines ready to be used as patterns for the new ones. We see no benefit to the coated wire so we will use 1/4" or 3/16" diameter  un-coated 1 x 19 wire for the replacements.


Here is the access port to the fasteners for the two forward bow pulpit mounting feet. It is very tight and difficult to wield wrenches and not drop nuts and washers down into the anchor locker, which is directly below it. The hole in the centre of the group of three on the right is for the running light wires which are routed up through the pulpit tubing.


Here is the boat looking a little forlorn with no pulpit as we strip old varnish and clean up the teak at the stem.


The fasteners for the aft pulpit mounting feet were more accessible, but look what we found in the caulk under the starboard foot! Sadly, based on the workmanship we have seen elsewhere on the boat, we weren't too surprised to find this or to discover the mounting holes had all been drilled straight through the deck 'sandwich' with no effort made to protect the wooden deck core from rot due to leaks.


After cleaning off all the old caulk we employed a simple and popular trick to waterproof all the holes. Using a rotary Dremel we opened up the centre of all the holes, filled them with epoxy and re-drilled them in the correct locations. Every through-deck hole got the same treatment.


The back edge of a 1/4" two-flute cutter is set approx 3/16" beyond the contact face of the cutting guide. The cutter can then be moved around within the existing hole until the 1/8" cutter shank contacts the edges of the hole. In this way an oversize 'slug' of deck core approx. 3/8" diameter can be removed without enlarging the original hole. 


To control vertical movement a cutting guide attachment is used. If the core material is thicker than the cutter length, the cutting guide can be adjusted to allow a second, deeper cut.


Not the best photo but the 3/8" dia. oversize relief cut into the deck core can be seen through the original 1/4" dia. hole. The cracked and chipped gel coat around the hole is due to bad technique when the hole was originally drilled. We found a lot of holes that looked this way.


After the middle of the holes are opened up, a piece of duct tape is applied to seal the underside of each hole and prevent the epoxy filler from leaking out.


The next step is to mix up some epoxy with a little thickener and fill the modified holes. Some painter's tape around the holes can help with clean up. Care must be taken while filling the holes so as not to trap air which will cause the epoxy to sag while curing. Finally the holes are re-drilled and countersunk slightly. A wipe over with acetone and they are ready for re-assembly.


Here is a hole ready for re-drilling after the epoxy has cured.


Here is the pulpit being after being polished and the mounting feet cleaned up.


After reading some impressive write-ups about the benefits of using butyl mastic as a bedding material we decided to go that way for all our deck hardware. Use the link below to read more about butyl at Compass Marine. We ordered our butyl from them and found that they also offer a wealth of great info on numerous other DIY boat maintenance and repair topics:


Here is some butyl mastic going onto one of the pulpit mounting feet. (Not to be confused with the photographer's feet!) We also wrapped butyl around the heads of all the mounting screws before assembling them.


The finished result, port aft pulpit foot and.........


..........the two forward feet. The rub strake being replaced is to protect the teak at the stem from the anchor chain.


We worked our way aft using the same technique on all the lifeline stanchions and spinnaker pole chocks until we came to the mid-ship cleats.


While we had the lifelines off we treated ourselves to 3 new furler line blocks to replace the plain fairleads we had. The difference is amazing. We knew there was some drag through the fairleads but, until we installed these blocks, we had no idea how much.


Another shot of the Schaefer stanchion mounted furler line blocks.


Most of the interior fasteners for the stanchions are in places where using a wrench or socket on the interior nuts was already difficult. Making things even worse on this one was the fact that two of the nuts and washers had been partially glassed over when the interior cabinetry had been tabbed in place. Another quality oversight?


A similar problem but this time on the other side of the boat.


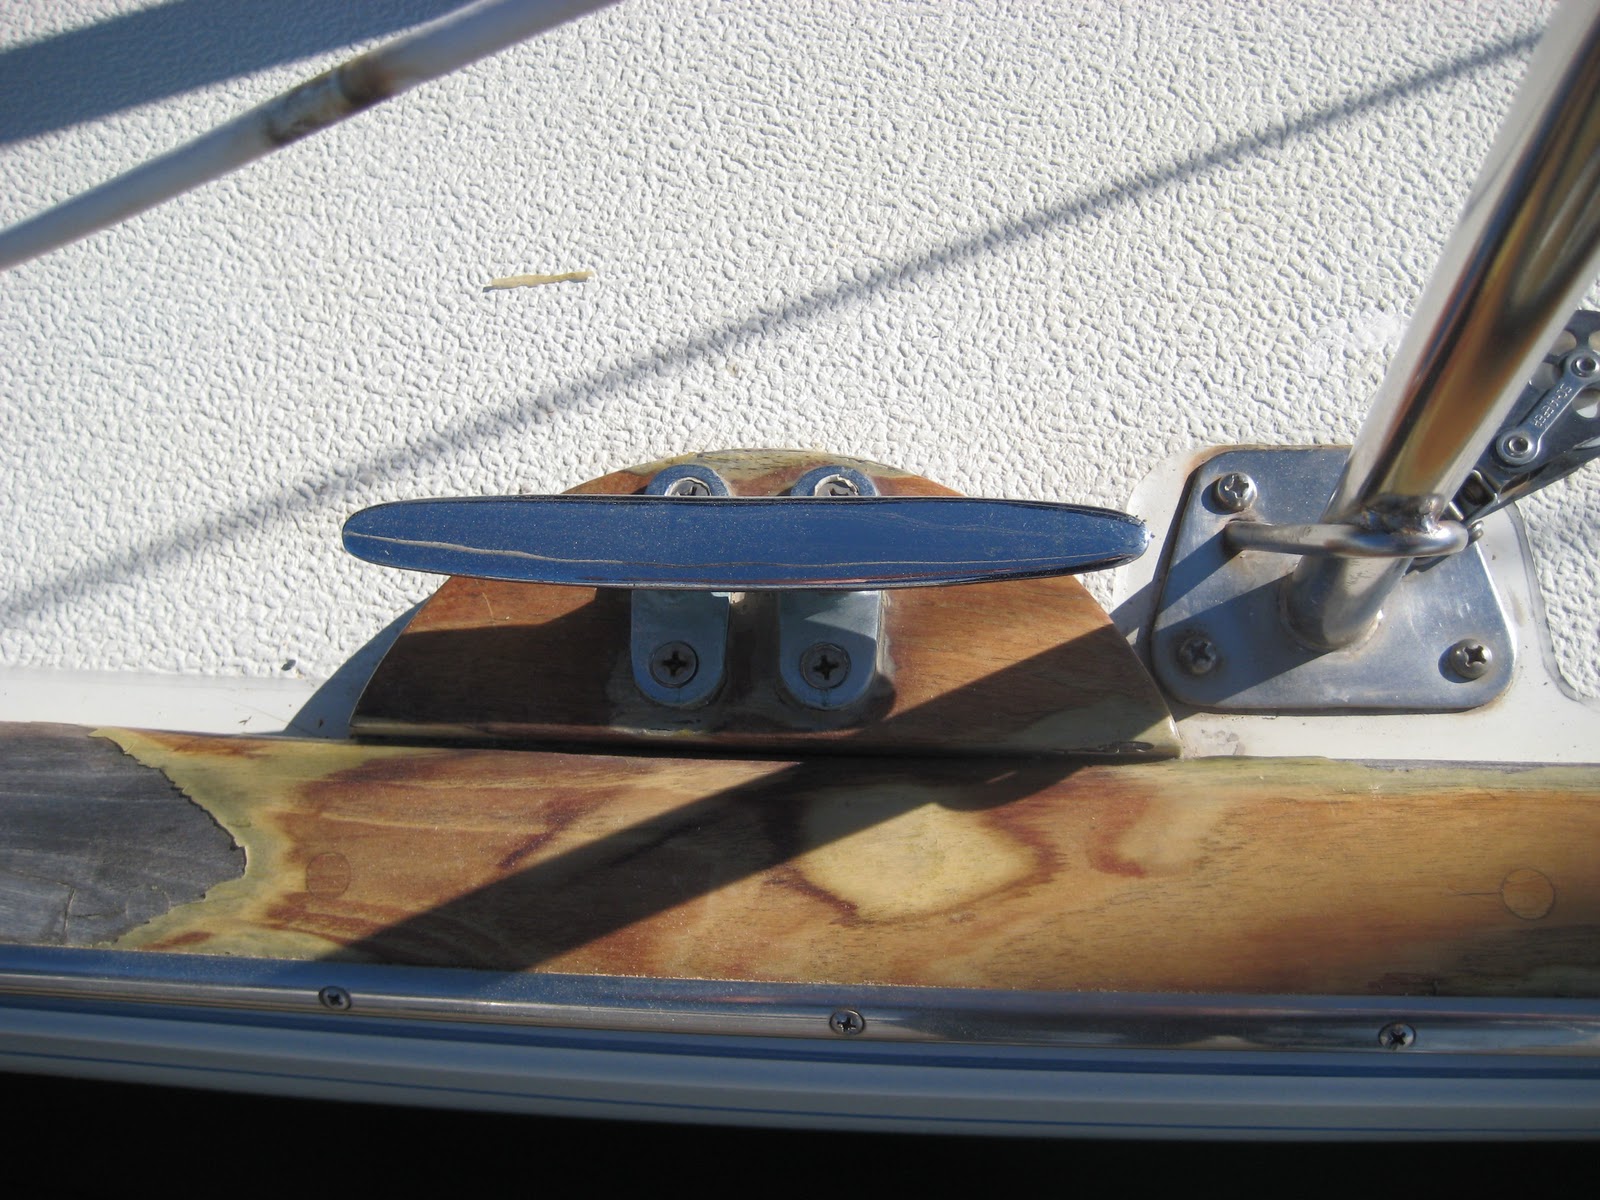
Here we are at the halfway point. Each mid-ship cleat is mounted on a semi-circular teak stand-off that butts against the cap rail. A problem with this design is that the stand-off effectively blocks the flow of run-off water down the gunwale and standing water collects there. We think this is probably the cause of our leaks.


There was a small chamfer provided on the lower corner of the stand-off block that was supposed to let run-off water flow between the block and the cap rail/gunwale, but the narrow channel it created quickly plugged with debris, varnish and caulk etc. This is the starboard side partially blocked.


The port side was completely blocked with caulk and debris from a PO cap rail re-caulk project. Another obvious flaw in this design is that the area of the cap rail joint where the stand-off block rests can't be caulked without first removing the block and the cleat!


Here is the port stand-off block removed showing the mess below. Water that seeped between the block and the cap rail was held there and eventually leaked through the original 30 year old cap rail caulk.


The starboard side was just as bad, although there wasn't any obvious leak......yet! As can be seen here, the clearance groove for water running down the gunwale had been blocked with crud and was another leak waiting to happen.  


With the cleat and stand-off removed, this shot shows clearly where the previous cap rail re-caulk job had stopped on either side of the stand-off block, leaving the original old caulk untouched behind it. Both sides of the boat had the same problem.


Here is a shot of one of the stand-off blocks cleaned up and showing the small chamfer on the edge.


We felt the small chamfer was inadequate and so we cut a larger step instead. It still isn't ideal but it is less likely to plug up and it will be a lot easier to keep the gunwale clear in the future.


Another shot of one of the bigger steps we cut into the stand-off blocks.


After the blocks were modified we epoxy coated all the lower surfaces that would be inaccessible for oiling after they had been re-installed.


The stand-off and cleat mounting holes were opened up and epoxy-filled like the pulpit and lifeline stanchions described earlier.


The cap rail was stripped and sanded where the cleat mounting block sat and the area of the cap rail joint that had been hidden behind the stand-off, and missed during the previous re-caulk job, was finally caulked properly. We are confident this is where our leaks were coming from.


The cleat and stand-off were reassembled and re-installed using the butyl mastic and all new hardware. This 'after' shot shows the much bigger space for the flow of run-off water along the gunwale. Compare this with the 'before' shots earlier in the post.


A liberal coating of teak oil finished the modified stand-off and made things look a lot better......plus there will be no trapped water in this area in the future. Keeping the oiled wood looking fresh will be a bit of a chore but it will keep us looking presentable until we make a final decision re: toe rail vs cap rail.


Here is a shot showing all the stanchions and bow pulpit re-bedded and back in place ready for the new lifelines. The short section of refinished cap rail next to the midship mooring cleat is clearly visible. The re-bedding of the stern 'pushpit' will be dealt with after the new lifelines are installed.


While we were waiting for the replacement lifelines to be assembled we started to re-finish the rest of the cap rail. This shot shows all the fixins staged ready to go. Full details in a later post.


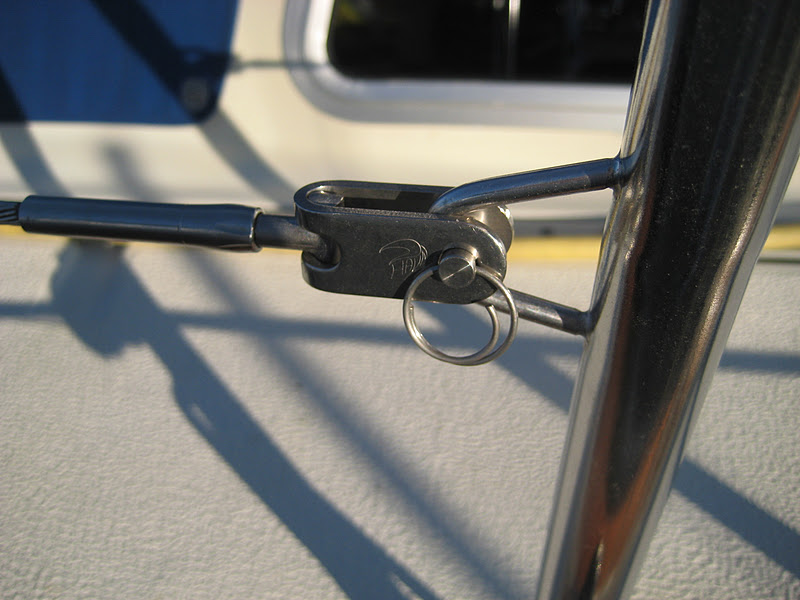
We eventually went with 3/16" lifelines in 1 x 19 wire and chose closed turnbuckles to replace the open ones. Combined with the smaller toggles it gives a cleaner and less 'clunky' look without compromising strength.


We also used cotter rings instead of cotter pins on all the clevis pins. They are re-usable, easier to remove, less likely to snag fingers or clothing and we think they look better.


Here is the finished job.......looking good.